Contents
Previous Next
Uninstalling GSX Server on a Windows Host
To uninstall GSX Server, complete the following steps. These steps remove all the components you installed with the GSX Server master installer, including the server software, the VMware Management Interface and the VMware Scripting APIs.
If you chose the custom installation path, any components you installed at that time are removed when you use the master installer to uninstall GSX Server.
1. On a Windows Server 2003 host, choose Start > Settings > Control Panel > Add or Remove Programs. Select the VMware GSX Server Installer and click Change.
On a Windows 2000 host, choose Start > Settings > Control Panel > Add/Remove Programs. Select the VMware GSX Server Installer and click Change.
2. After the master installer launches, click Next.
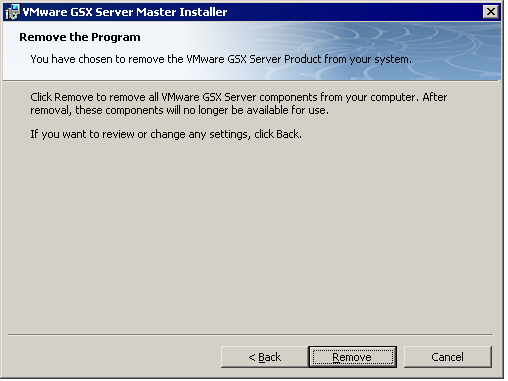
3. Select Remove, then click Next.
4. When you are ready to begin removing GSX Server, click Remove.
5. During the uninstallation, you are asked whether you want to keep your VMware licenses in the Windows registry. VMware strongly recommends you keep your licenses, in case you reinstall or upgrade your software. To keep the licenses in the registry, click Yes. The uninstallation continues.
6. During the uninstallation, you are asked whether you want to keep any login information for any virtual machines configured to run as specific user accounts. If you choose to delete the login information, then reinstall GSX Server, any virtual machines configured to run as specific users will run as the user that powers on those virtual machines. After you decide whether or not to keep the login information, the uninstallation continues.
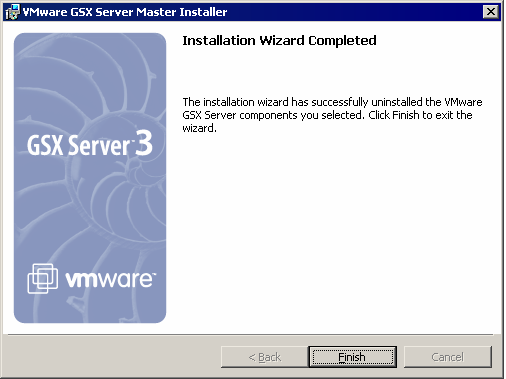
7. After all the components are removed, click Finish.
8. If you see a prompt that suggests you reboot your server, do so now to allow GSX Server to complete the uninstallation correctly.
Removing Selected Components on a Windows Host
With the master installer, you can choose to remove specific components from your GSX Server installation. For example, if you decide to not use the VmPerl API, you can remove only that component.
Note: Do not use this method to remove GSX Server. Use it to remove the VMware Scripting APIs or the VMware Management Interface only.
To remove a component, complete the following steps.
1. On a Windows Server 2003 host, choose Start > Settings > Control Panel > Add or Remove Programs. Select the VMware GSX Server Installer and click Change.
On a Windows 2000 host, choose Start > Settings > Control Panel > Add/Remove Programs. Select the VMware GSX Server Installer and click Change.
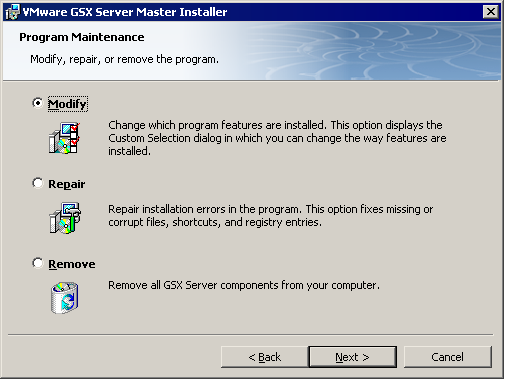
2. After the master installer launches, click Next. The Program Maintenance screen appears.
3. Select Modify, then click Next. The Custom Setup screen appears.
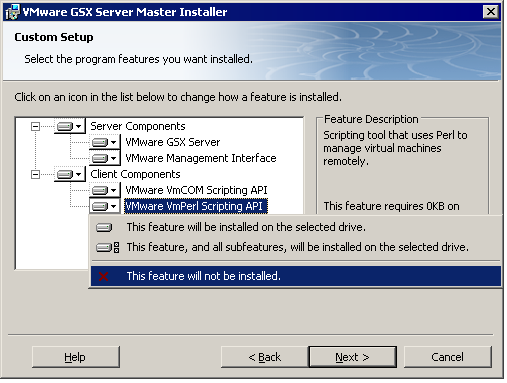
4. Click the arrow to open the menu next to the component you want to remove, select This feature will not be installed, then click Next.
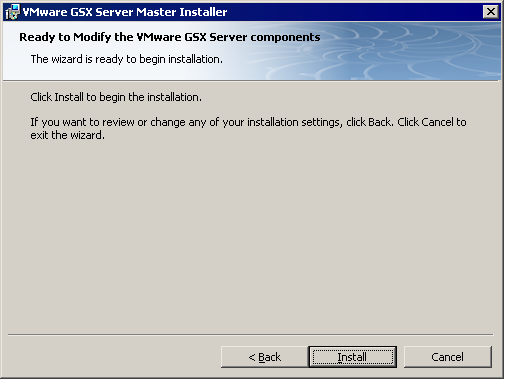
5. When you are ready to begin removing the component, click Install.
6. After the component is removed, click Finish.
Uninstalling the VMware Virtual Machine Console on a Windows Host
To uninstall the console on a Windows host, use Add/Remove Programs in the Windows Control Panel.
1. Choose Start > Settings > Control Panel.
2. Double-click Add/Remove Programs (Add or Remove Programs on a Windows Server 2003 host).
3. Select VMware Virtual Machine Console, then click Change.
Note: If the console was installed on Windows NT 4.0, click Add/Remove.
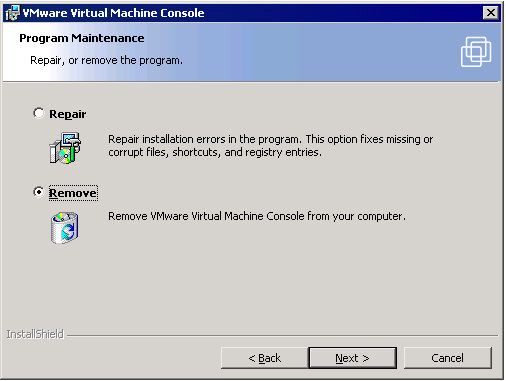
4. A wizard starts. Click Next.
5. In the next screen, select Remove, then click Next.
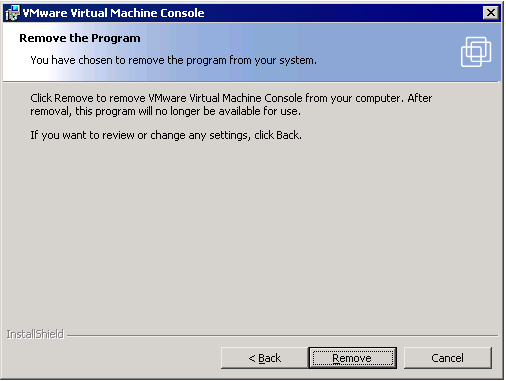
6. To start removing the console, click Remove.
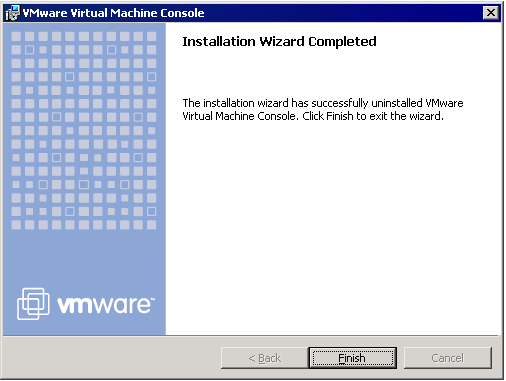
7. After the wizard finishes removing the console, click Finish. You do not need to reboot the system after you remove the console.