Contents
Previous Next
Installing VMware Tools in a Windows Virtual Machine
VMware Tools for Windows guest operating systems supports all Windows guest operating systems.
The detailed steps for installing VMware Tools depend on the version of Windows you are running. The steps that follow show how to install VMware Tools in a Windows Server 2003 guest. Some steps that are automated in current versions of Windows must be performed manually in Windows 9x and Windows NT.
Note: If you are running GSX Server on a Windows host and your virtual machine has only one CD-ROM drive, the CD-ROM drive must be configured as an IDE or SCSI CD-ROM drive. It cannot be configured as a generic SCSI device.
Installing VMware Tools in a Windows Guest Operating System
1. Power on the virtual machine.
2. When the guest operating system starts, prepare your virtual machine to install VMware Tools.
Choose VM > Install VMware Tools.
The remaining steps take place inside the virtual machine.
3. Log in to the virtual machine as an administrator.
Note: You must be an administrator to install VMware Tools in a Windows guest operating system, unless the guest operating system is Windows Me, Windows 98 or other early versions of Windows.
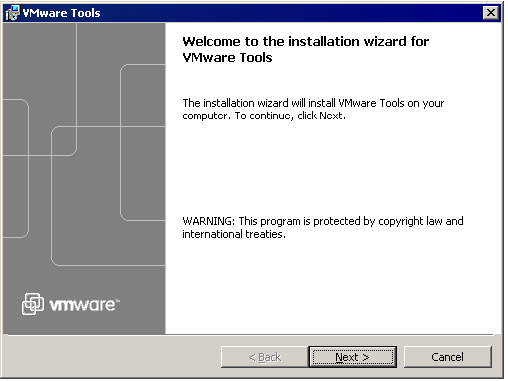
4. If you have autorun enabled in your guest operating system (the default setting for Windows operating systems), a dialog box appears after a few seconds. It asks if you want to install VMware Tools. Click Yes to launch the InstallShield wizard.
If autorun is not enabled, the dialog box does not appear automatically. If it doesn't appear, run the VMware Tools installer. Click Start > Run and enter D:\setup\setup.exe where D: is your first virtual CD-ROM drive.
Note: You do not use an actual CD-ROM to install VMware Tools, nor do you need to download the CD-ROM image or burn a physical CD-ROM of this image file. The VMware GSX Server software contains an ISO image that looks like a CD-ROM to your guest operating system and even appears as a CD-ROM in Windows Explorer. This image contains all the files needed to install VMware Tools in your guest operating system. When you finish installing VMware Tools, this image file no longer appears in your CD-ROM drive.
The VMware Tools installation wizard starts.
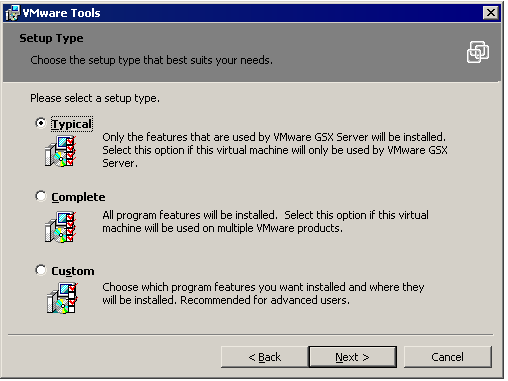
5. Click Next to continue with the VMware Tools installation wizard. The Setup Type dialog box appears.
6. Choose whether you want to perform a typical, complete or custom installation. The installer uses this selection each time you upgrade VMware Tools.
Typical Installation
A typical installation installs only those components used by GSX Server. For example, the driver to use shared folders (a feature in VMware Workstation) is not installed in a typical installation in a virtual machine created with GSX Server.
A typical installation installs the utilities to enhance the performance of the guest operating system, and a set of drivers specific to GSX Server virtual machines — the VMware SVGA driver, the VMware Mouse driver, the VMware SCSI driver and the VMware vmxnet networking driver (the vlance driver is installed automatically when you created the virtual machine).
If you plan on not using this virtual machine with other VMware products, such as VMware Workstation, you can use the typical installation. To choose the typical installation, select
Typical, click
Next, then go to
step 7.
Complete Installation
A complete installation installs the utilities to enhance the performance of the guest operating system, and all the drivers — the VMware SVGA driver, the VMware Mouse driver, the VMware SCSI driver, the VMware vmxnet networking driver (the vlance driver is installed automatically when you created the virtual machine) and the shared folders driver (for use by virtual machines with VMware Workstation).
If you plan on using this virtual machine with other VMware products, use the complete installation. To choose the complete installation, select
Complete, click
Next, then go to
step 7.
Custom Installation
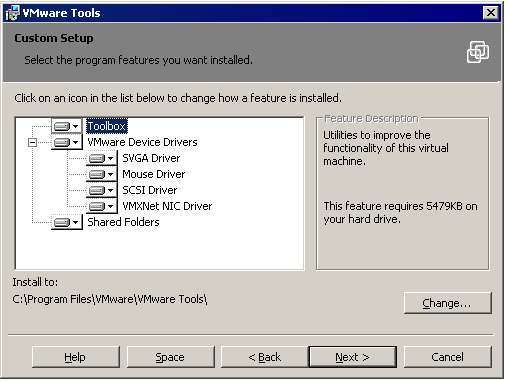
A custom installation lets you pick and choose which components to install. You can always run the installer again at a later date to install components you did not install the first time, or remove components you no longer want. Select Custom and click Next. The Custom Setup screen appears.
In the Custom Setup screen, pick and choose the components to install. Click the arrow to the left of the component you do not want to install and select the appropriate option from the menu.
If you need to determine how much free space is on the guest click Space. This is useful if you are choosing a custom installation due to limited disk space on your guest.
If you want to install all the VMware Tools components in a directory other than the default, click Browse and select the directory. If the directory does not exist, the installer creates it for you.
When you are ready to continue, click Next.
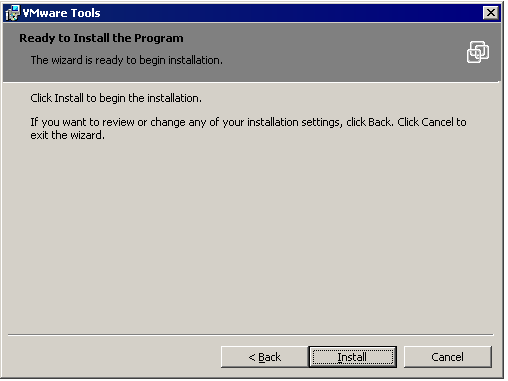
7. If you want to change any settings or information you provided, now is the time to make those changes. Click Back until you reach the dialog box containing the information you want to change.
Otherwise, click Install. The installer begins copying files to your host.
8. You may see one or more Digital Signature Not Found dialog boxes when the installer begins to install the virtual drivers. You can safely ignore these warnings and click Yes or Continue to approve installation of the drivers.
9. After the installer finishes installing the files, click Finish. If you installed the VMware SVGA driver, most Windows guest operating systems can use it only after you reboot the guest. With Windows XP guests, you do not have to reboot to use the new driver.
With some older Windows guest operating systems, extra steps are needed.
Additional Steps for Some Versions of Windows When Migrating from Old Disk Versions
If you are migrating a GSX Server 2 disk to GSX Server 3 and your guest operating system is Windows NT, Windows Me, Windows 98 or Windows 95, you need to configure the video driver by hand. Instructions open automatically in Notepad at the end of the installation process. If the Notepad window is hidden, bring it to the front by clicking the Notepad button on the Windows taskbar.
For details, see the steps below that correspond to your guest operating system.
Windows NT
1. After installing VMware Tools, click Finish. The Display Properties dialog box appears.
2. Click the Display Type button. The Display Type dialog box appears.
3. Click the Change button. The Change Display dialog box appears.
4. Select VMware, Inc. from the Manufacturer list.
5. Select VMware SVGA as the display adapter and click OK.
6. Click Yes in response to the on-screen question about third-party drivers to install the driver, then click OK to confirm the drivers were installed.
7. Click Close from the Display Type dialog box, then click Close from the Display Properties dialog box.
8. Click Yes to restart Windows NT and start using the new video driver.
9. The VMware Tools background application is launched automatically when you reboot your virtual machine.
Windows Me
1. After installing VMware Tools, click Finish. The Display Settings dialog box appears.
2. Click the Advanced button.
3. Click the Adapter tab.
4. Click the Change button. This starts the Update Device Driver wizard.
5. The wizard now presents two options. Choose the second option to Specify the location of the driver.
Click Next.
6. Check the Specify a location checkbox. Enter the following path:
D:\video\win9x
D: is the drive letter for the first virtual CD-ROM drive in your virtual machine.
Click OK.
7. Windows Me automatically locates your driver.
8. Select the VMware SVGA II display adapter and click Next.
9. Click Next to install the driver.
If you are upgrading a virtual machine created under GSX Server 2, you may see a dialog box that warns, "The driver you are installing is not specifically designed for the hardware you have.... Do you wish to continue?" Click Yes.
After the driver is installed, click Finish.
10. Click Yes to restart Windows Me and start using the new video driver.
11. The VMware Tools background application starts automatically when you reboot your virtual machine.
Windows 98
1. After installing VMware Tools, click Finish. The Display Settings dialog box appears.
2. Click the Advanced button. The Standard Display Adapter (VGA) Properties dialog box appears. If you are upgrading from a previous version of the VMware drivers, this dialog box is titled VMware SVGA Properties.
3. Click the Adapter tab.
4. Click the Change button. This starts the Update Device Driver wizard. Click Next.
5. The wizard presents two options. Choose the option to Display a list of all drivers in a specific location. Click Next.
6. Select Have Disk. The Install From Disk dialog box appears.
7. Enter the following path:
D:\video\win9x
D: is the drive letter for the first virtual CD-ROM drive in your virtual machine.
Click OK.
8. Select VMware SVGA display adapter and click OK.
9. Answer Yes to the on-screen question, then click Next to install the driver. After the driver is installed, click Finish.
10. Click Close in the SVGA Properties dialog box, then click Close in the Display Settings dialog box.
11. Click Yes to restart Windows 98 and start using the new video driver.
12. The VMware Tools background application starts automatically when you reboot your virtual machine.
Windows 95
1. After installing VMware Tools, click Finish. The Display Settings dialog box appears.
2. Click the Advanced Properties button. The Advanced Display Properties dialog box appears.
3. Click the Change button. The Select Device dialog box appears.
4. Select Have Disk.
5. Enter the following path:
D:\video\win9x
D: is the drive letter for the first virtual CD-ROM drive in your virtual machine.
Click OK.
6. Click OK again to install the driver.
7. Click Close from the Advanced Display Properties dialog box, then click Close from the Display Setting dialog box.
8. Click Yes to restart Windows 95 and start using the new video driver.
9. The VMware Tools background application starts automatically when you reboot your virtual machine.