


| |
|
This version of Amaya supports two kinds of annotations: annotations that apply to a whole document and annotations that apply to a specific point or selection in a document.
After any of these options are performed, an annotation dialog displays the annotation metadata and the body of the annotation.
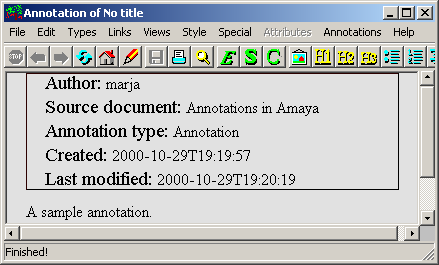
Currently, the metadata consists of the author's name, title of the annotated document, annotation type, creation date, and last modification date. Some of the metadata fields have special properties:
Below the header area is the annotation body area. It shows the current content and can be edited like any other HTML document.
Saving an annotation is the same as saving any other document with Amaya: choose Save from the File menu (or use its equivalent shortcut or button).
Local annotations are saved to the annotations directory and remote annotations are saved to the annotation post server, where they are stored if the user has write access.
To convert a local annotation into a shared one, choose Post Annotation from the Annotations menu to save the annotation to the Post server as defined in the Configuration for Annotations dialog. If this operation is successful, the local annotation will be removed and future Save operations will go directly to that annotation server.
Some commands that can be applied to a document in the Amaya document window also can be applied to an annotation document in the Annotation window. For example, the body of an annotation can be printed by choosing Print from the File menu, or reloaded by choosing Reload document from the File menu.