Contents
Previous Next
Creating a New Virtual Machine with the New Virtual Machine Wizard
When you create a new virtual machine, you end up with a set of files that represent a new computer, complete with a blank, unformatted hard disk — the virtual disk — onto which you install the guest operating system. The virtual disk by default has all its disk space preallocated at the time it is created.
The virtual machines you create are located on the host to which you are currently logged on, even if the console you are using is running on a remote client.
Note: Before you create the virtual machine, you should check the installation notes for the guest operating system you intend to install in it. You can find this information in the
VMware Guest Operating System Installation Guide available from the Help menu or from the VMware Web site at
www.vmware.com/support/guestnotes/doc/index.html.
Complete the following steps to create a new virtual machine.
1. Launch the VMware Virtual Machine Console.
2. Start the New Virtual Machine Wizard. Choose File > New Virtual Machine or click the New Virtual Machine icon on the console Home tab.
The New Virtual Machine Wizard presents you with a series of screens that you navigate using the Next and Back buttons at the bottom of each screen. At each screen, follow the instructions, then click Next to proceed to the next screen.
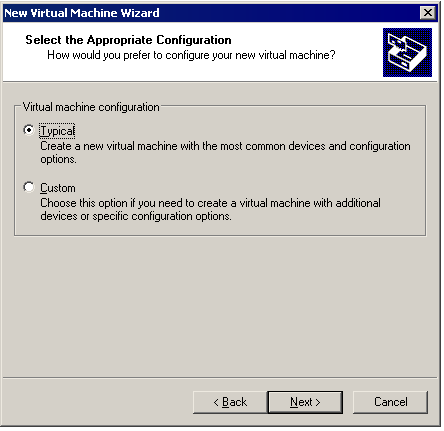
3. Select the method you want to use for configuring your virtual machine.
If you select Typical, you can specify or accept defaults only for
The guest operating system.
The virtual machine name and the location of the virtual machine's files.
The network connection type.
The size of the virtual disk.
Allocating all the disk space for the virtual disk at the time you create it.
Splitting the virtual disk into 2GB files.
Select Custom if you want to
Allocate an amount of memory different from the default.
Choose between the LSI Logic and BusLogic types of SCSI adapters. (An ATAPI IDE adapter is always installed.)
Let other users access this virtual machine.
Have the virtual machine automatically power on or off when the GSX Server Windows host starts up or shuts down.
Specify the user account the virtual machine uses when running.
Use an existing virtual disk.
Use a physical disk rather than a virtual disk (for advanced users).
Use an IDE virtual disk for a guest operating system that would otherwise have a SCSI virtual disk created by default and vice versa.
Create a virtual disk as a single disk file. If the virtual disk is larger than 2GB, the host file system must support files larger than 2GB.
Store your virtual disk files in a particular location.
Specify a particular virtual device node for the virtual disk.
Use independent disk mode (if you don't plan to use snapshots with this virtual machine; see Independent Disks).
Note: If you follow the custom path, you still specify the options under the typical path.
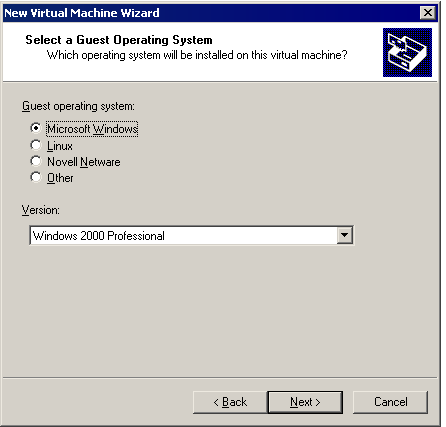
4. Select a guest operating system.
This screen asks which operating system you plan to install in the virtual machine. The New Virtual Machine Wizard uses this information to select appropriate default values, such as the amount of memory needed. The wizard also uses this information when naming associated virtual machine files.
Under Guest operating system, select the operating system family (Microsoft Windows, Linux, Novell NetWare or Other — for MS-DOS, FreeBSD or other guests not listed), then select the specific operating system from the Version list.
If the operating system you are using is not listed, select Other, then select Other again in the Version list.
The remaining steps assume you plan to install a Windows Server 2003 Enterprise guest operating system. You can find detailed installation notes for this and other guest operating systems in the
VMware Guest Operating System Installation Guide, available from the Help menu or from the VMware Web site at
www.vmware.com/support/guestnotes/doc/index.html.
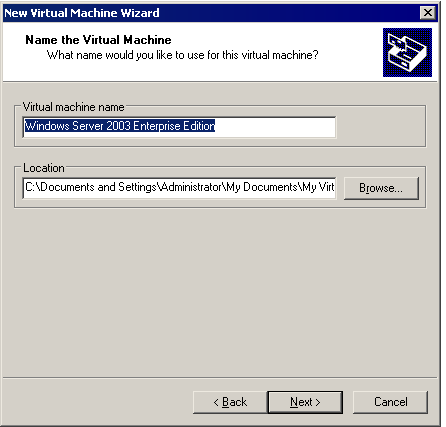
5. Select a name and directory for the virtual machine.
The name specified here is used in the VMware Virtual Machine Console and the VMware Management Interface. It is also used as the name of the directory where the files associated with this virtual machine are stored.
Each virtual machine must have its own directory. All associated files, such as the configuration file and the disk file, are placed in this directory.
Windows hosts: The virtual machine directory and its files are stored in the default location <installdrive>:\Virtual Machines.
Linux hosts: The virtual machine directory and its files are stored in the default location /var/lib/vmware/Virtual Machines.
If some users without access to this host need to access this virtual machine, you may consider placing the virtual machine files in a location that is accessible to them. For more information, see
Sharing Virtual Machines with Other Users.
Note: You can change the default location from the console; choose Host > Settings > General. Click Browse to select a new path. Make sure that you locate the virtual machine in a unique directory.
Virtual machine performance may be slower if your virtual hard disk is on a network drive. For best performance, be sure the virtual machine's directory is on a local drive. However, if other users need to access this virtual machine, you should consider placing the virtual machine files in a location that is accessible to them. For more information, see
Sharing Virtual Machines with Other Users.
If you selected
Typical as your configuration path, go to
step 9.
If you selected Custom as your configuration path, continue with the steps for customizing your virtual machine configuration.
6. Specify whether this virtual machine should be private.
By default, a virtual machine is private, so only you have access to it. This is useful, for example, if you are in charge of provisioning virtual machines on one host and will propagate the virtual machines to other hosts.
If you are creating a virtual machine using the Typical path, then only you can access the virtual machine. The virtual machine is private.
You can change access to this virtual machine in the virtual machine settings editor (choose
VM >
Settings >
Options >
Permissions). For more information about private virtual machines, see
Only You Can See Virtual Machines You Create.
If you are a host administrator, you can specify virtual machine permissions in the host configuration. For more information about permissions and virtual machines, see
Securing Virtual Machines and the Host.
7. Choose the user account for running the virtual machine (for virtual machines on Windows hosts only) and the host startup and shutdown options.
Windows hosts: Under Virtual machine account, choose which user account the virtual machine uses when it runs. This account is used for actions like network access from within the virtual machine and access to virtual machine resources that are on the network.
User that powers on the virtual machine — the virtual machine runs as the account of the user who powered on the virtual machine until the virtual machine is powered off. Other users can connect to the virtual machine but it still runs as the user who powered on the virtual machine.
The level of access other users have to this virtual machine is based on the level of access of the user that powers it on. For information about user access to virtual machines, see
Understanding Permissions and Virtual Machines.
Note: This user can run virtual machines that are in local storage only.
This user — the virtual machine runs as the user account specified here. The password is not validated until you power on the virtual machine. You can specify a local user account, a local system administrator account or a fully-qualified domain user account for this user.
All hosts: Under
Startup/Shutdown Options, choose whether you want this virtual machine to power on automatically when the GSX Server host starts up and whether you want the virtual machine to power off when the host shuts down. You can configure a virtual machine to start up or shut down automatically when the host starts or shuts down only when the host is configured accordingly. If the host settings are disabled, you must enable them before you can specify these options for a virtual machine. For more information, see
Configuring Startup and Shutdown Options for Virtual Machines.
To enable the startup and shutdown options, you must configure the virtual machine to run as an administrator user.
When the virtual machine is powered off, you can change all these options.
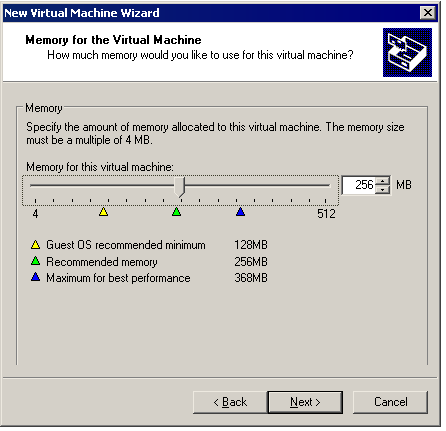
8. Allocate an amount of memory to the virtual machine.
The New Virtual Machine Wizard provides a default value based on your guest operating system selection, along with the recommended range and the total amount of memory all running virtual machines can use.
The wizard also indicates the minimum amount of memory recommended by the manufacturer and the GSX Server recommended maximum value for best performance of your virtual machine on this server host.
To change the amount of memory to be allocated to the virtual machine, move the slider to the appropriate location, use the spin controller next to the field or type a new value in the field.
Caution: You cannot allocate more than 2000MB of memory to a virtual machine if it is stored on a file system that cannot support files larger than 2GB, such as FAT16. You will not be able to power on such a virtual machine. Further, you cannot allocate more than 2000MB of memory to a virtual machine if it is stored on a FAT32 file system, even though it does support files up to 4GB in size.
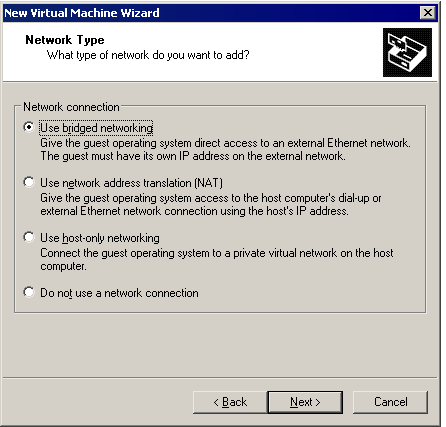
9. Configure the networking capabilities of the virtual machine.
If your host computer is on a network and you have a separate IP address for your virtual machine (or can get one automatically from a DHCP server), select Use bridged networking.
If you do not have a separate IP address for your virtual machine but you want to be able to connect to the Internet, select Use network address translation (NAT). NAT is useful if you have a wireless network adapter on a Linux host (as bridged networking on wireless network adapters is supported only on Windows hosts). It also allows for the sharing of files between the virtual machine and the host operating system.
To enable your virtual machine to use a virtual network limited to the host and the virtual machines on the host using only the host-only network adapter, select Use host-only networking.
For more details about VMware GSX Server networking options, see
Networking.
If you selected
Typical as your configuration path, go to
step 13.
If you selected Custom as your configuration path, continue with the steps for customizing your virtual machine configuration.
10. Choose the type of SCSI adapter you want to use with the virtual machine.
An IDE and a SCSI adapter are installed in the virtual machine. The IDE adapter is always ATAPI. You can choose between a BusLogic or LSI Logic SCSI adapter. The default for your guest operating system is already selected. Most guests except for newer operating systems like Windows Server 2003, Red Hat Enterprise Linux 3 and NetWare 6.5 default to the BusLogic adapter.
The LSI Logic adapter has improved performance and works better with generic SCSI devices. The LSI Logic adapter is included with Windows Server 2003.
The choice of SCSI adapter does not affect your decision to make your virtual disk an IDE or SCSI disk. However, most guest operating systems do not include a driver for the LSI Logic adapter; you must download the driver from the LSI Logic Web site. See the VMware Guest Operating System Installation Guide for details about the driver and the guest operating system you plan to install in this virtual machine.
You cannot change the SCSI adapter type after you create the virtual machine.
11. Select the disk you want to use with the virtual machine.
To use a new, unformatted virtual disk, select Create a new virtual disk.
Virtual disks are the best choice for most virtual machines. They are quick and easy to set up and can be moved to new locations on the same host computer or to different host computers.
To use an existing virtual disk with this virtual machine, select Use an existing virtual disk. Browse to select the disk.
To install the guest operating system on a physical (also called raw) IDE disk, select Use a physical disk. To use a physical SCSI disk, add it to the virtual machine later with the virtual machine settings editor (VM > Settings). Booting from a physical SCSI disk is not supported.
Caution: VMware recommends that only advanced users should use physical disks with virtual machines.
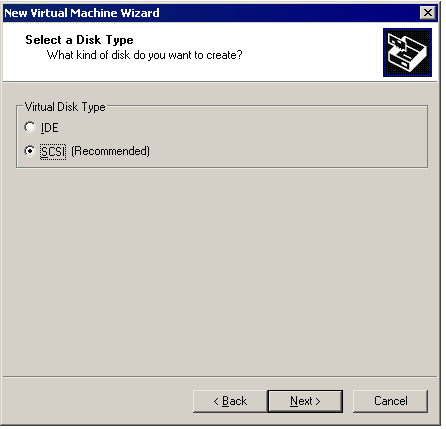
12. Select whether you want the virtual disk to be an IDE disk or a SCSI disk.
The wizard recommends the best choice based on the guest operating system you selected.
13. Specify the capacity of the virtual disk.
Enter the size of the virtual disk that you wish to create.
Your virtual disk can be as small as 0.1GB (100MB). A SCSI virtual disk can be as large as 256GB; an IDE virtual disk can be as large as 128GB. The default is 4GB.
By default, the full size of the virtual disk is allocated when you create the disk. Allocating all the space at the time you create the virtual disk gives somewhat better performance and ensures you do not run out of disk space on the host, but it requires as much disk space as the size you specify for the virtual disk. You cannot shrink a preallocated disk.
If this setting is larger than the space available on the host machine's hard disk, a warning message appears, and specifies how much space you have on the host. If the disk will exceed the available space on the host, you must make the virtual disk smaller or clear the Allocate all disk space now check box.
If you do not preallocate the disk, the virtual disk's files start small and grow as needed.
You may also specify whether you want the virtual disk created as one large file or split into a set of 2GB files. You should split the virtual disk if it is stored on a FAT32 file system or a file system that cannot support files larger than 2GB, such as FAT16. To do this, check Split into 2GB files.
If you later decide you want to enlarge a virtual disk, change the virtual disk from preallocated to growable (or vice versa), or split a virtual disk that was created in a single file (or vice versa), you can use the VMware Virtual Disk Manager to expand or convert the virtual disk. For more information, see
Using VMware Virtual Disk Manager.
If you selected Typical as your configuration path and you have set the disk options you want to use, click Finish. GSX Server creates the virtual machine. If you selected Custom as your configuration path, continue to the next step.
Make the Virtual Disk Big Enough
The virtual disk should be large enough to hold the guest operating system and all of the software that you intend to install, with room for data and growth.
You cannot change the virtual disk's maximum capacity later.
You can install additional virtual disks using the virtual machine settings editor.
For example, you need about 1GB of actual free space on the file system containing the virtual disk to install Windows Server 2003 and popular applications such as Microsoft Office inside the virtual machine. You can set up a single virtual disk to hold these files. Or you can split them up — installing the operating system on the first virtual disk and using a second virtual disk for applications or data files.
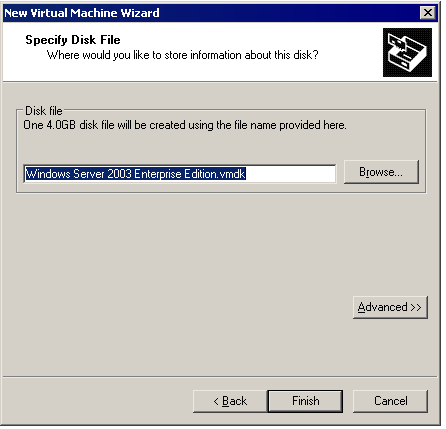
14. Specify the name and location of the virtual disk's files.
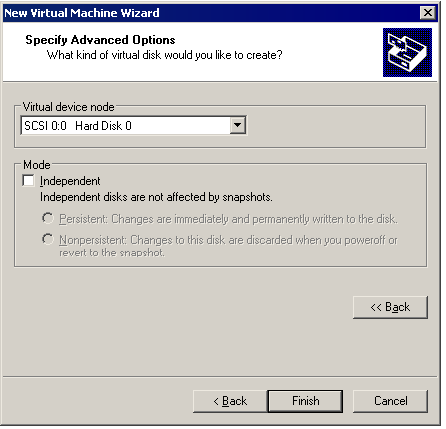
If you want to specify which virtual device node should be used by your virtual disk or if you want to use independent disk mode, click Advanced.
Specifying a disk mode is useful in certain special-purpose configurations in which you want to exclude disks from the snapshot. For more information on the snapshot feature, see
Taking Snapshots.
Normal disks are included in the snapshot. In most cases, this is the setting you want.
Independent disks are not included in the snapshot.
Caution: The independent disk option should be used only by advanced users who need it for special-purpose configurations.
You have the following options for an independent disk:
Persistent — changes are immediately and permanently written to the disk.
Nonpersistent — changes to the disk are discarded when you power off or reset the virtual machine.
When you have set the filename and location you want to use and have made any selections you want to make on the Specify Advanced Options screen, click Finish. GSX Server creates the virtual machine.
Your new virtual machine is like a physical computer with a blank hard disk. Before you can use it, you need to partition and format the virtual disk and install an operating system. The operating system's installation program may handle the partitioning and formatting steps for you. For information about installing the guest operating system, see the VMware Guest Operating System Installation Guide.